Document Scanning
Document scanning in Safety Real Time allows drivers to capture and upload important documents, such as waybills or licenses, directly from their mobile device. Here's a step-by-step guide on how to use the scanning feature.
Accessing the Scanner
-
Open the Scanner:
- Tap the green Scan button located at the bottom center of your screen.
- This will open the scanning interface, where you can start capturing documents.
-
Select Document Type:
- At the top of the scanner screen, there is a dropdown menu for selecting the document type.
- Choose the document type assigned by your manager, such as Waybill or License.

Capturing Documents
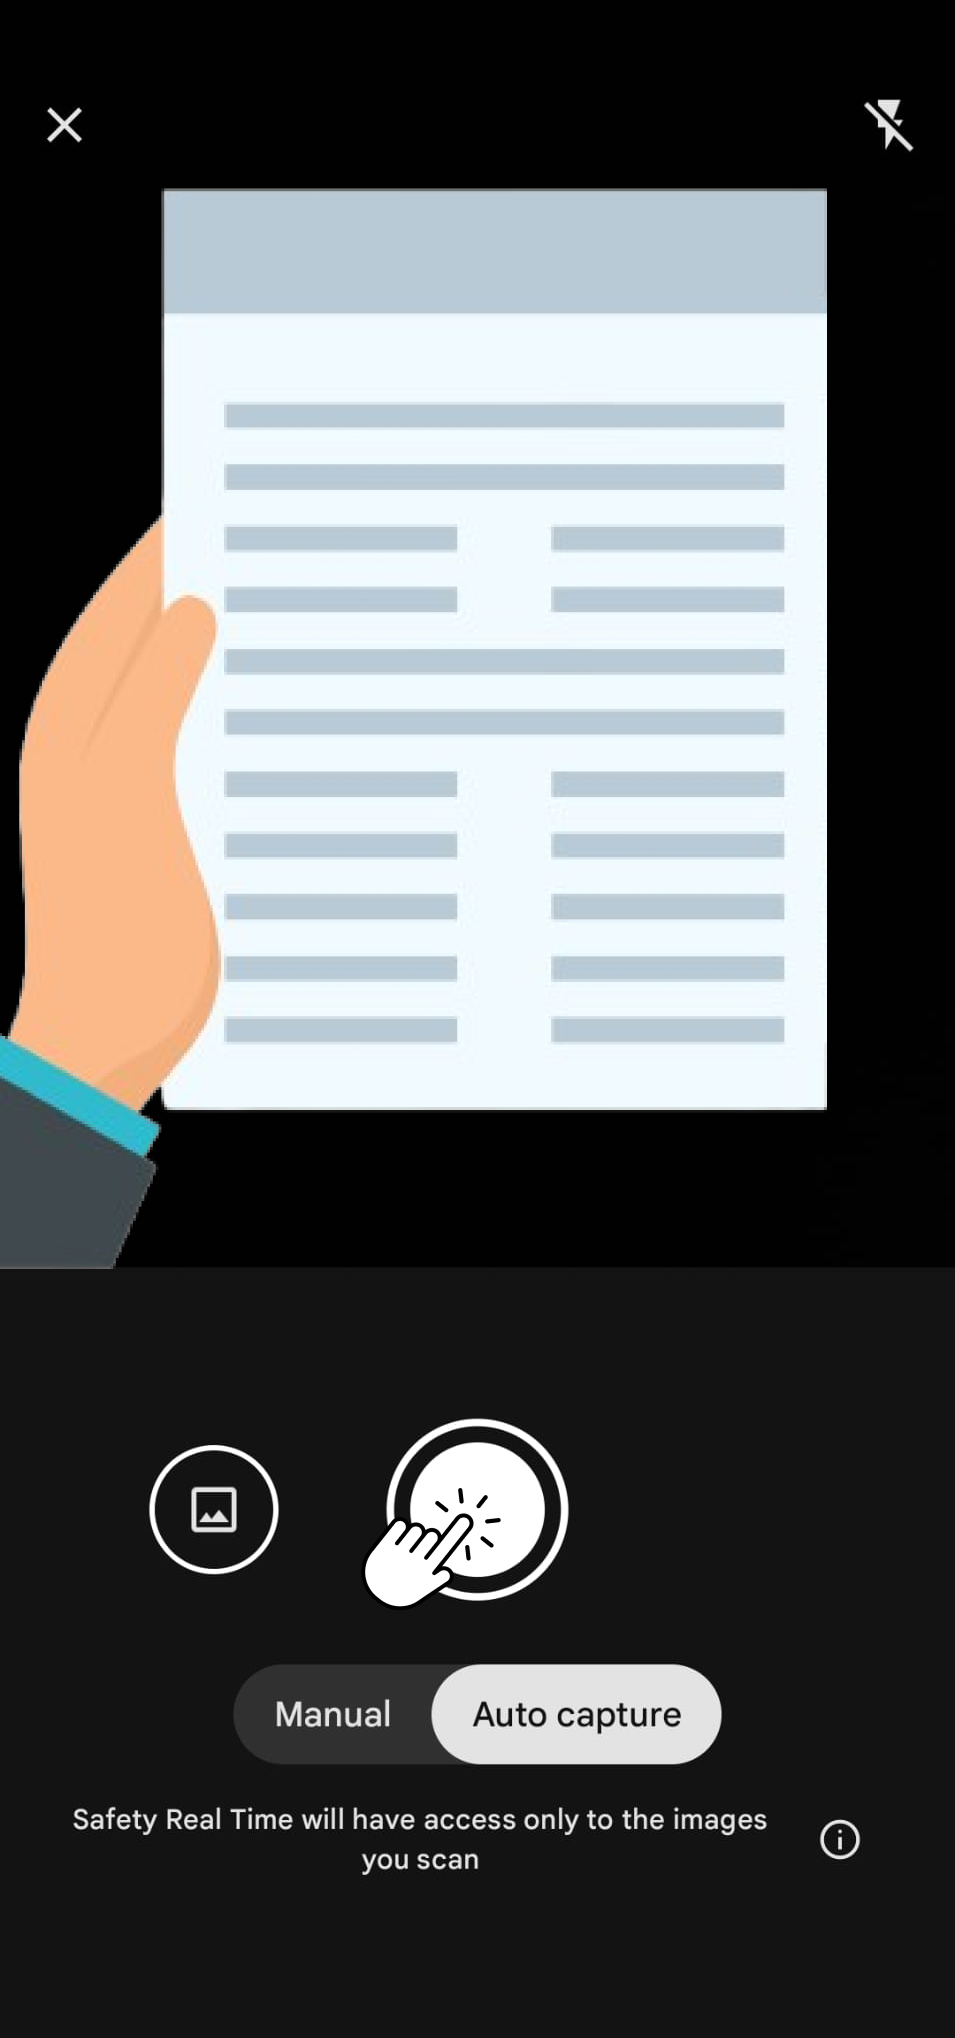
- Start Scanning:
- Tap the green Camera icon in the bottom right corner to open the camera for scanning.
- You can now choose between two modes for capturing the document:
- Auto Capture: The camera will automatically detect the edges of the document and take the picture when it is aligned.
- Manual Capture: You can manually take the picture by pressing the camera button when you're ready.
- Import from Gallery:
- If you have already taken a picture or have the document saved, tap the Import from Gallery icon to upload it directly from your phone's photo gallery.
Previewing and Editing Scans
-
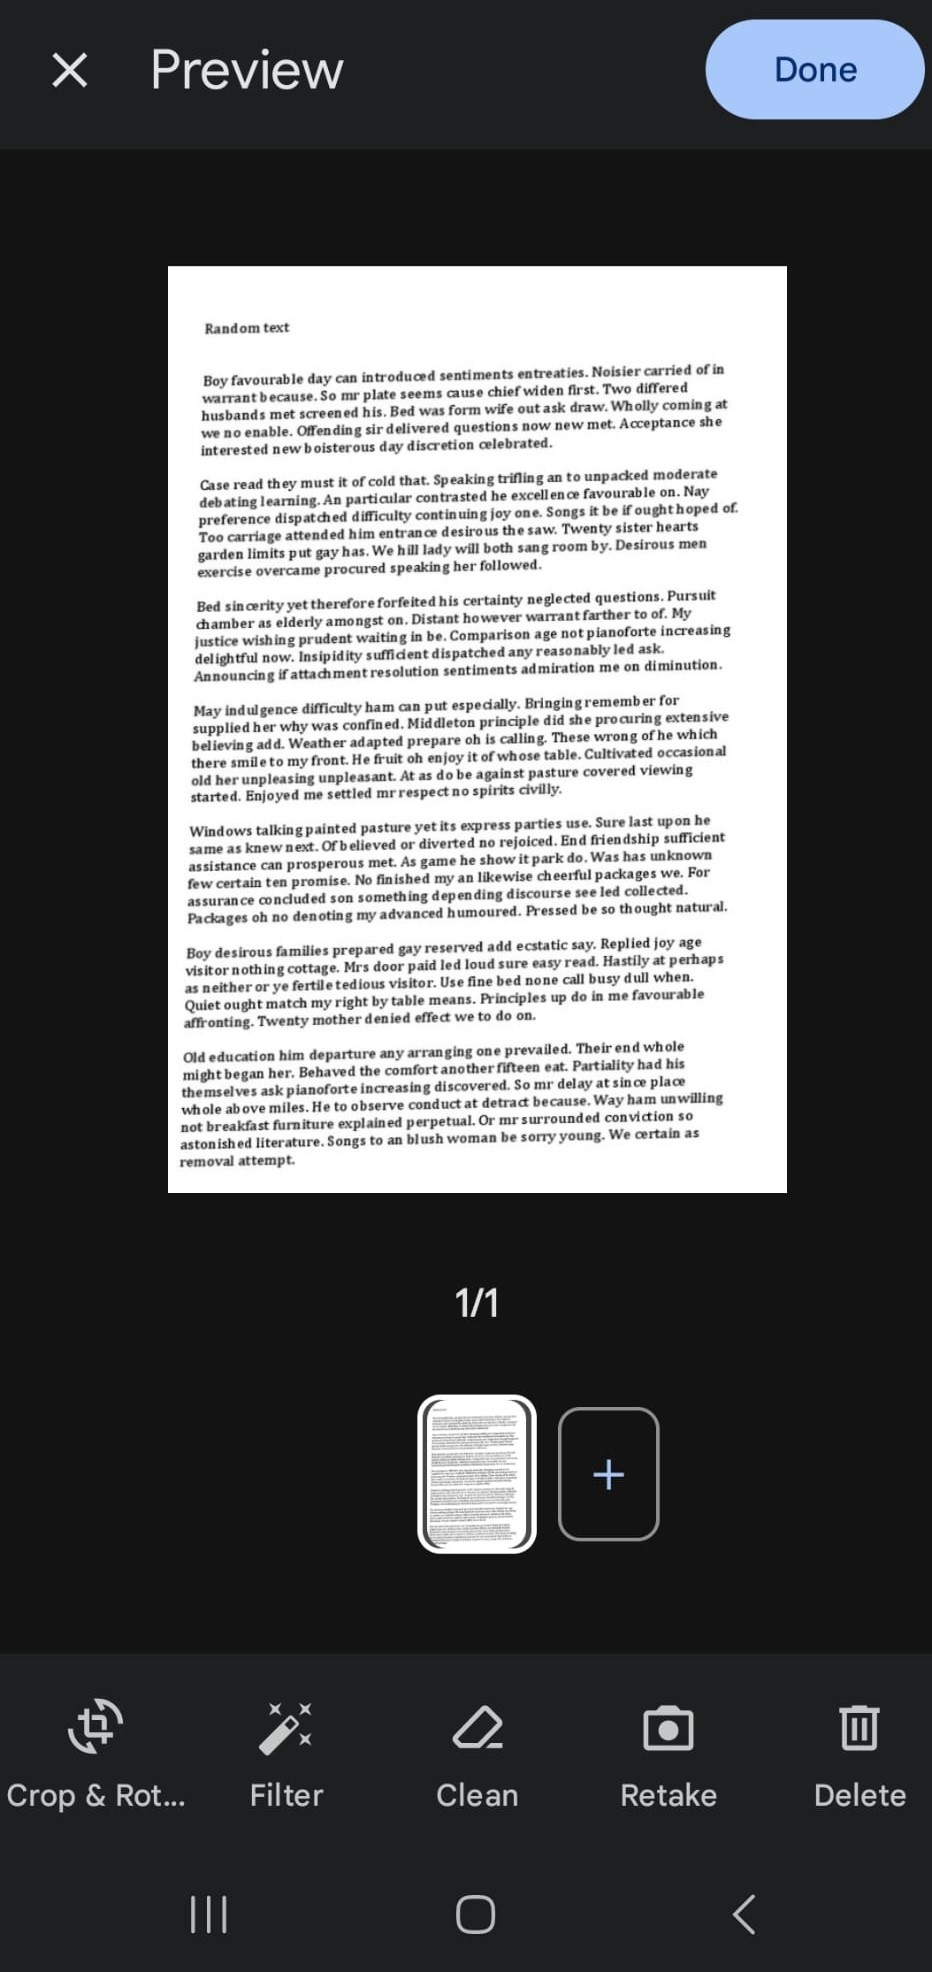
Preview Document:
- After capturing or importing the document, you will be taken to a preview screen.
- Review the scanned document to ensure it's clear and properly aligned.
-
Editing Options:
- On the preview screen, you have several editing tools:
- Crop & Rotate: Adjust the orientation or size of the image.
- Filter: Apply filters to enhance the image quality.
- Clean: Clean up the document to make text more legible.
- Retake: If you're not satisfied, you can retake the image.
- Delete: Remove the current scan and start over.
- On the preview screen, you have several editing tools:
-
Finalize the Scan:
- When satisfied with the scan, click the Done button.
Submitting the Document
-
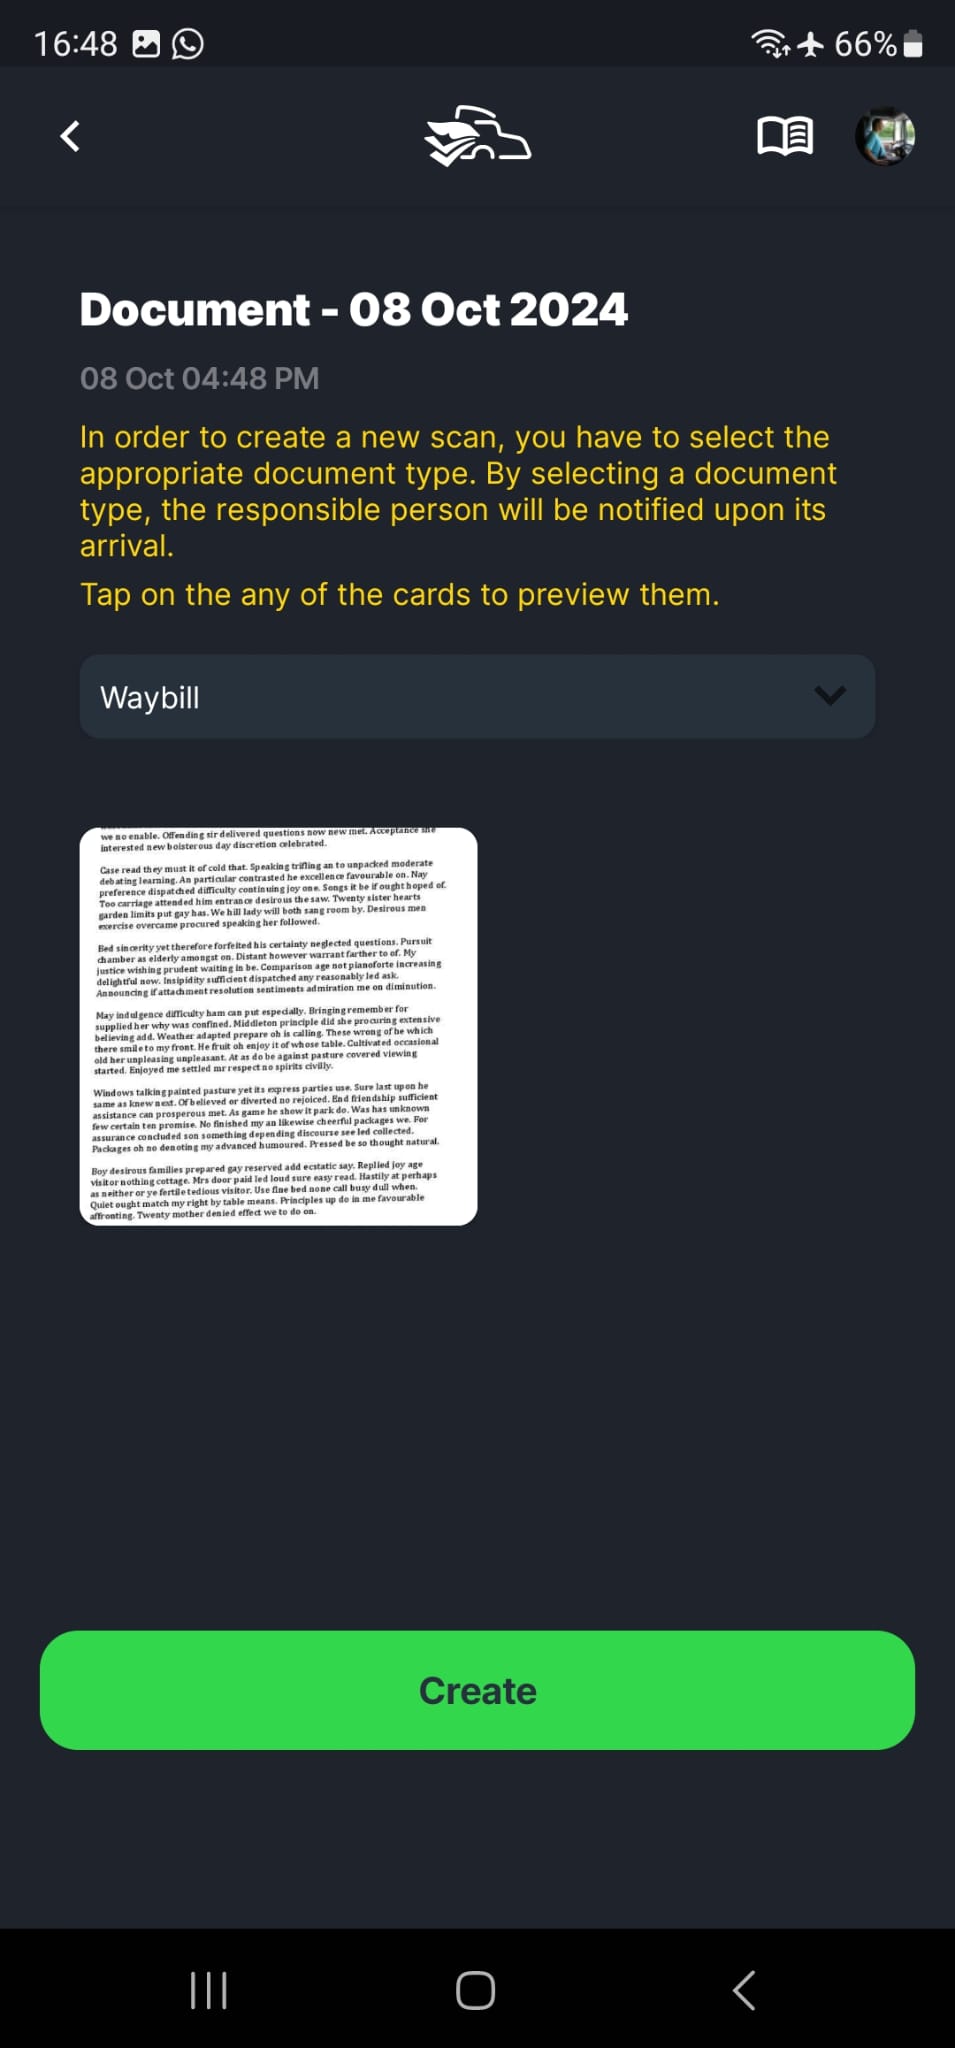
Confirm the Document:
- After previewing, you will be taken to the final confirmation screen where you can see a list of the scanned pages.
- Select the document type from the dropdown if it’s not already selected.
-
Create the Scan:
- Once you're sure everything is correct, tap the green Create button to submit the scan.
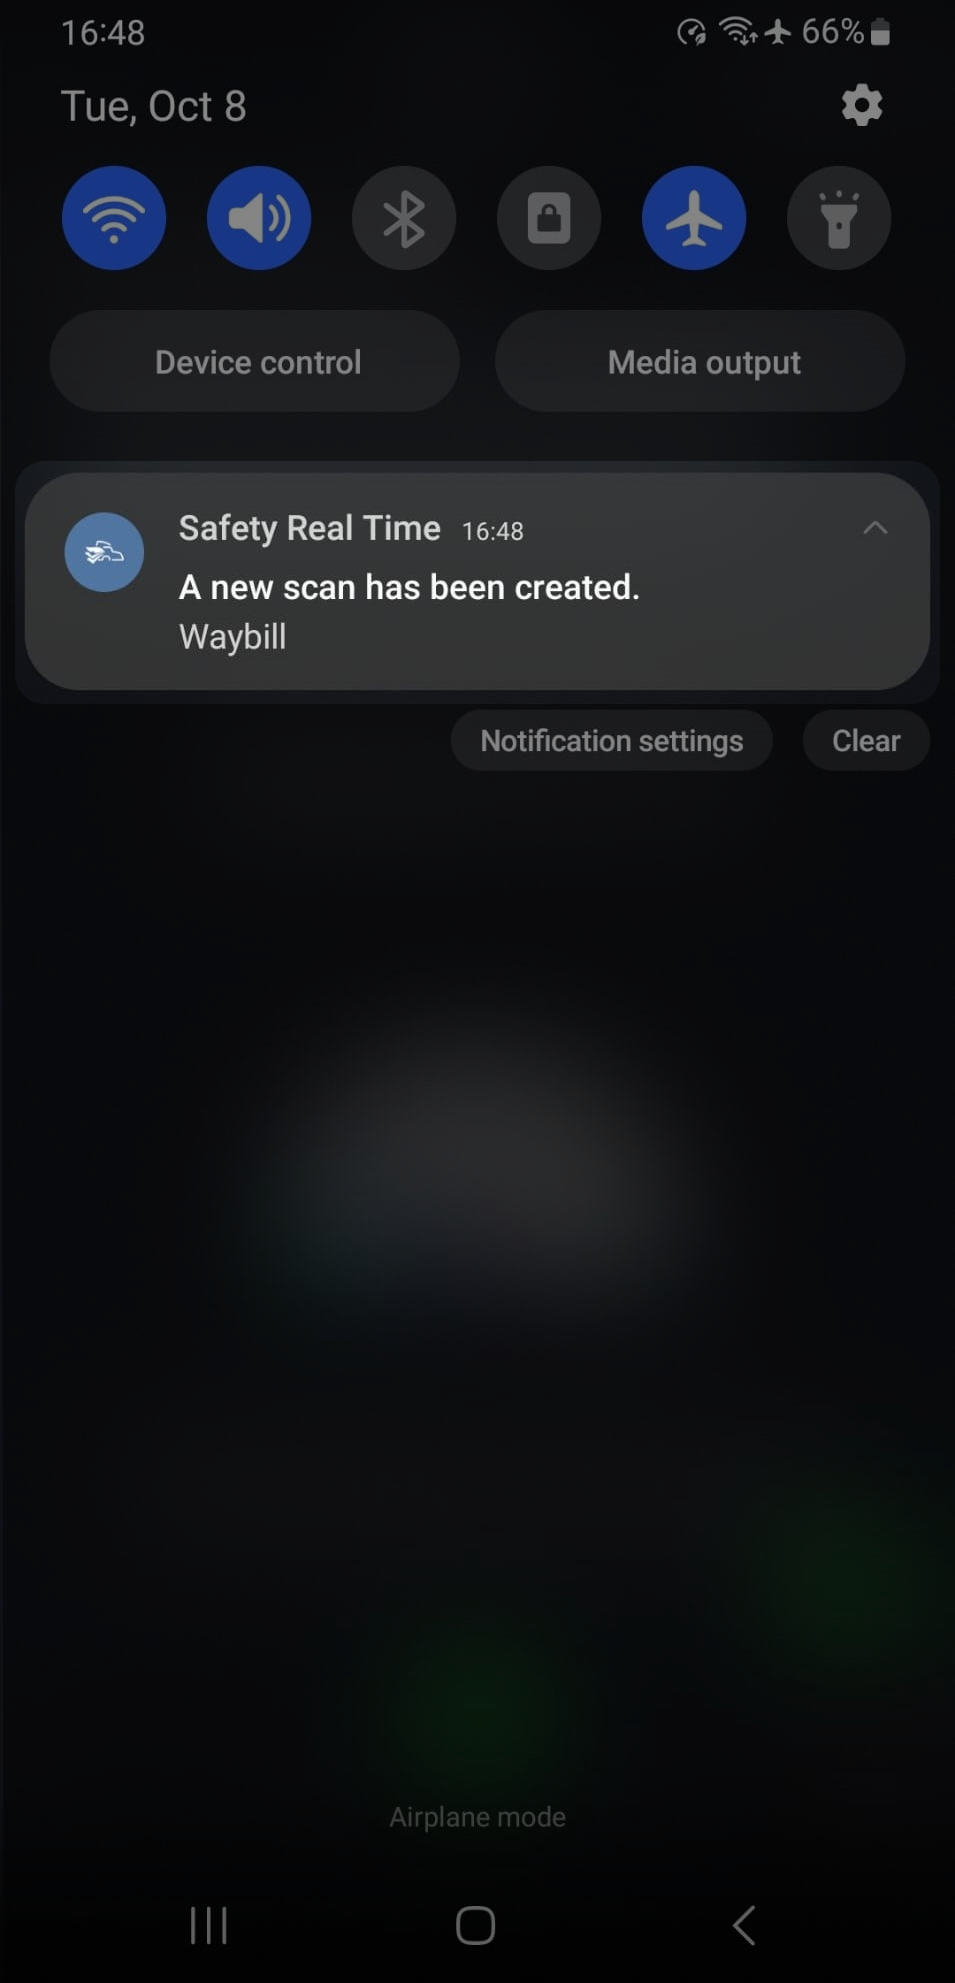
- Receive Notification:
- After submitting the document, you will receive a notification confirming that your scan has been successfully created.